
As I sat on the couch with my yarn sprawled around me, I stumbled upon a delightful design that was not only charming but also sparked joy—a no-sew triceratops amigurumi! This beginner-friendly pattern allows you to create your very own adorable dino without the hassle of assembly, making it a perfect project for quick gifting or enhancing a child’s room. With its continuous crochet method, you’ll find it works up rapidly in snug, plush yarn, ensuring a huggable and cheerful creation. Whether you’re a seasoned crocheter or just starting, this project offers both fun and functionality, bringing a touch of whimsy to your crafting journey. Curious about how to get started? Let’s dive in and bring this little triceratops to life!
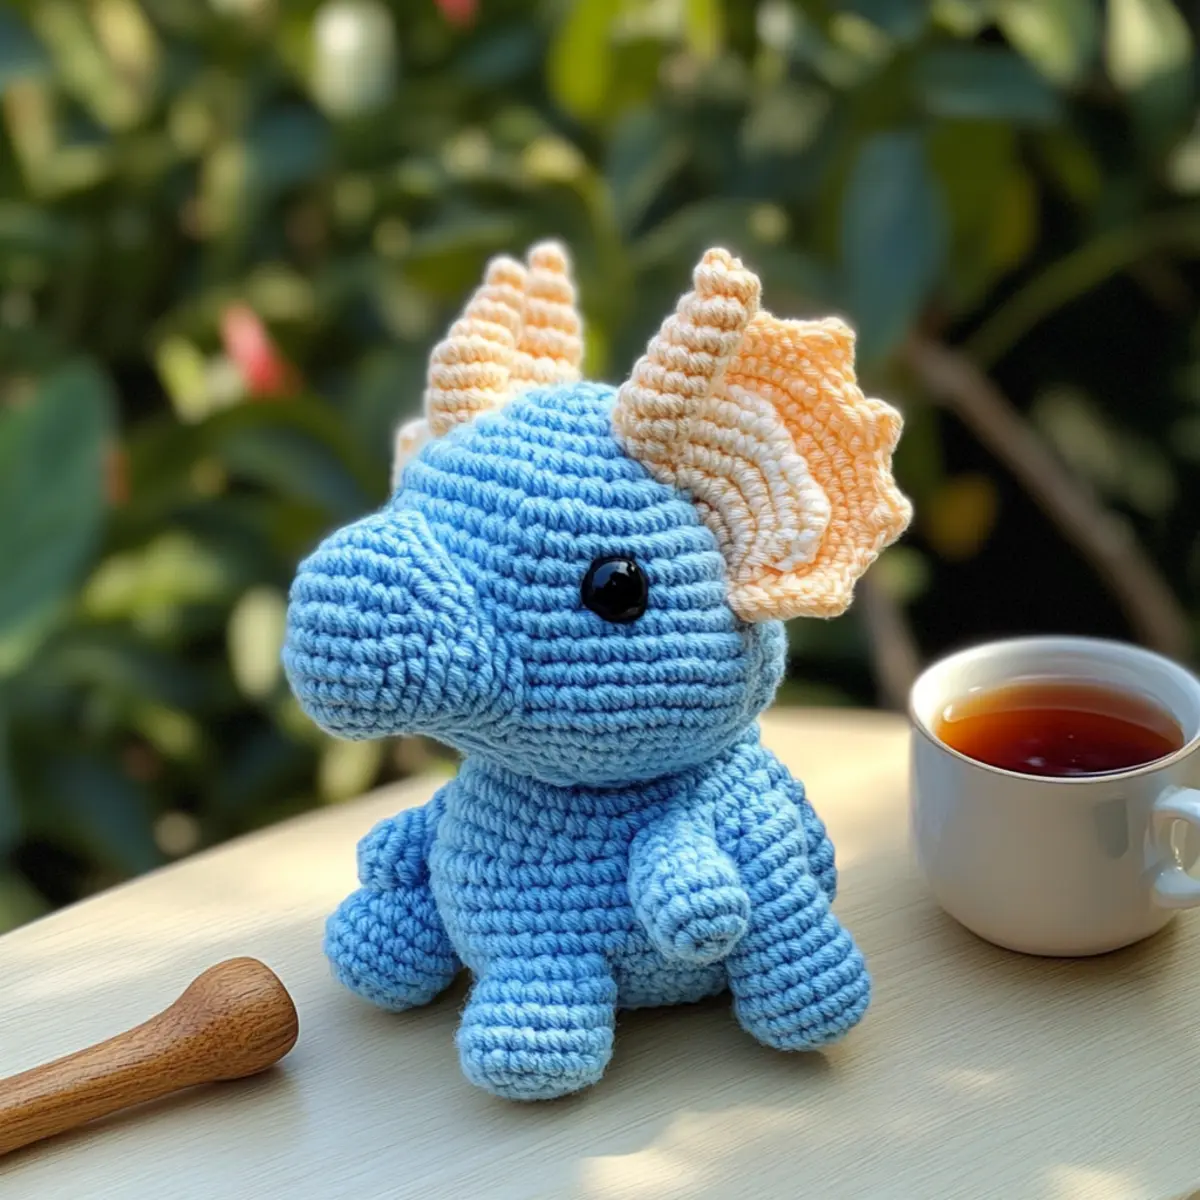
No-Sew Triceratops Amigurumi Materials & Tools
Note: Gather your materials to embark on your delightful no-sew crochet journey!
Yarn
• Medium Weight Yarn – Approximately 100-150 yards (90-137 meters) of smooth worsted or chenille for a plush look.
Tools & Notions
• 4.5 mm (US 7) Hook – Adjust down if you prefer tighter stitches to prevent stuffing visibility.
• Stitch Marker – Essential for keeping track of rounds and ensuring a seamless project.
• Tapestry Needle – Perfect for weaving in ends and finishing your lovely creation.
• Safety Eyes – Optional; can be substituted with embroidered eyes for a charming touch.
Why is This Triceratops Pattern Perfect?
Simplicity at its finest: With a no-sew design, you’ll skip the frustration of assembly, making it ideal for beginners and busy crafters alike.
Quick Results: The continuous crochet method allows you to create a delightful little dino in no time—perfect for last-minute gifts!
Tactile Fun: Made with soft worsted or plush yarn, this triceratops is not only cute but also wonderfully cuddly.
Creative Freedom: Customize colors for a whimsical twist or add accessories for a personal touch! Need more ideas? Check out our guide on yarn customization for inspiration.
Engaging Craft: Each stitch will spark joy as you bring this adorable creature to life, making it a satisfying project for all skill levels.
Gauge & Sizing Notes
Don’t skip the gauge swatch! Ensuring your crochet tension is spot-on is crucial for crafting your No-Sew Triceratops Amigurumi accurately. A standard gauge measurement for this project is 4×4 inches (10×10 cm) = 12 stitches by 10 rows in single crochet. If you find your swatch is smaller than this, simply go up a hook size for a looser tension, or if it’s larger, consider switching to a smaller hook. To adjust the size of your dino, increase your starting chain in multiples of 6. This way, you can customize your triceratops to be just the right size for those cozy cuddles!
Step‑by‑Step Pattern for No-Sew Triceratops Amigurumi
Row 1: Start the Body
Begin with a magic ring (MR), chaining 2. Work 6 sc into the ring (6 sts). Pull the tail to close the ring tightly. Your work should begin to form a small circle. Be sure to keep your stitches snug for a neat appearance.
Row 2: Increase for Body
Ch 2, then work 2 sc in each stitch around (12 sts). You should notice the circle expanding, creating a fuller base for the body. Use a stitch marker to keep track of your rounds for consistency.
Row 3: More Increases
Ch 2, 1 sc in the next stitch, 2 sc in the next stitch; repeat from * to * around (18 sts). Your work will start to widen further; keep counting your stitches to ensure accuracy.
Row 4: Continue Expanding
Ch 2, 1 sc in the next 2 sts, 2 sc in the next stitch; repeat from * to * around (24 sts). At this stage, your piece will begin to look like a bowl shape, giving a sturdy base for the triceratops.
Row 5: Shape the Body
Ch 2, 1 sc in the next 3 sts, 2 sc in the next stitch; repeat from * to * around (30 sts). The shape will continue to deepen, creating a plush body. Ensure that your increases are uniform around the entire piece.
Row 6: Establish Continuous Rounds
Ch 2, work 1 sc in each stitch around (30 sts). This will form the body without any additional increases, allowing the triceratops to grow in height. Keep your tension consistent as you move along.
Row 7: Continue the Body
Ch 2, work 1 sc in the next 4 sts, 2 sc in the next stitch; repeat from * to * around (36 sts). Your triceratops body should now be starting to take on a pleasing shape and curvature.
Row 8: Form the Legs
Ch 2, work 1 sc in the next 5 sts, 2 sc in the next stitch; repeat from * to * around (42 sts). At this point, work starts forming the legs, which will be plush and rounded. Keep it firm while avoiding holes.
Row 9-10: Complete the Body
For both rounds, continue with 1 sc in each stitch around (42 sts). Your work should have a cozy, soft appearance and an inviting feel, indicative of a snug triceratops awaiting its remaining details.
Row 11: Creating the Neck
Ch 2, work 1 sc in the next 6 sts, 2 sc in the next stitch; repeat from * to * around (48 sts). A gentle curve should start to form as you shape the body upward into the neck area.
Row 12-18: Shape the Head
For Row 12-18, work 1 sc in each stitch around (48 sts). During these rounds, your triceratops will gradually shift from a body into a head! Pay attention to maintaining an even tension, which will help when you add embellishments later.
Row 19: Begin the Head Shaping
Ch 2, work 1 sc in the next 5 sts, then 2 sc in the next stitch; repeat from * to * around (54 sts). Your piece should begin to take on a more defined shape, ideal for where the safety eyes will go.
Row 20: Refine Head Shape
Ch 2, work 1 sc in the next 4 sts, then 2 sc in the next stitch; repeat from * to * around (60 sts). As you progress, the rounded dumpling shape becomes more apparent, giving your triceratops character.
Row 21: Start Reducing
Ch 2, work 1 sc in the next 5 sts, then 1 dec; repeat from * to * around (54 sts). This will help taper the head, enhancing the overall look of this adorable no-sew triceratops amigurumi. Keep stuffing firmly as you go.
Row 22: Adjust Head Shape
Ch 2, work 1 sc in next 4 sts, then 1 dec; repeat from * to * around (48 sts). At this point, your head should start to feel more compact as the design comes together with a pleasing shape.
Row 23: Continue Decreasing
Ch 2, work 1 sc in next 3 sts, then 1 dec; repeat from * to * around (42 sts). The head will begin to narrow, creating a cute dinosaur’s snout, so be sure to maintain your stuffing strategy for fullness.
Row 24: Final Head Reductions
Ch 2, work 1 sc in next 2 sts, then 1 dec; repeat from * to * around (36 sts). Your triceratops head should be close to rounded and ready to add those charming features like safety eyes or personalized embroidery.
Row 25: Last Reductions of Head
Ch 2, work 1 sc in next stitch, then 1 dec; repeat from * to * around (30 sts). You’ll see those final adjustments create a well-formed head for your no-sew triceratops, resulting in a delightful dino.
Row 26: Close the Head
Ch 2, work 1 dec around until it’s completely closed (12 sts). Stuff firmly as you reach the end—this will maintain the character of your triceratops head in a cozy way.
Step 1: Add Frill and Horns
After closing, use surface slip stitches to add a frill along the back of the head. For the horns, chain 4, attach with a sl st to the top of the head, and repeat for the second horn. This will give your triceratops its adorable character!
Step 2: Finishing Touches
Weave in all yarn ends using your tapestry needle for a clean finish. Ensure that everything is secure; your no-sew triceratops is now complete and ready to find a cozy spot or make a perfect gift!
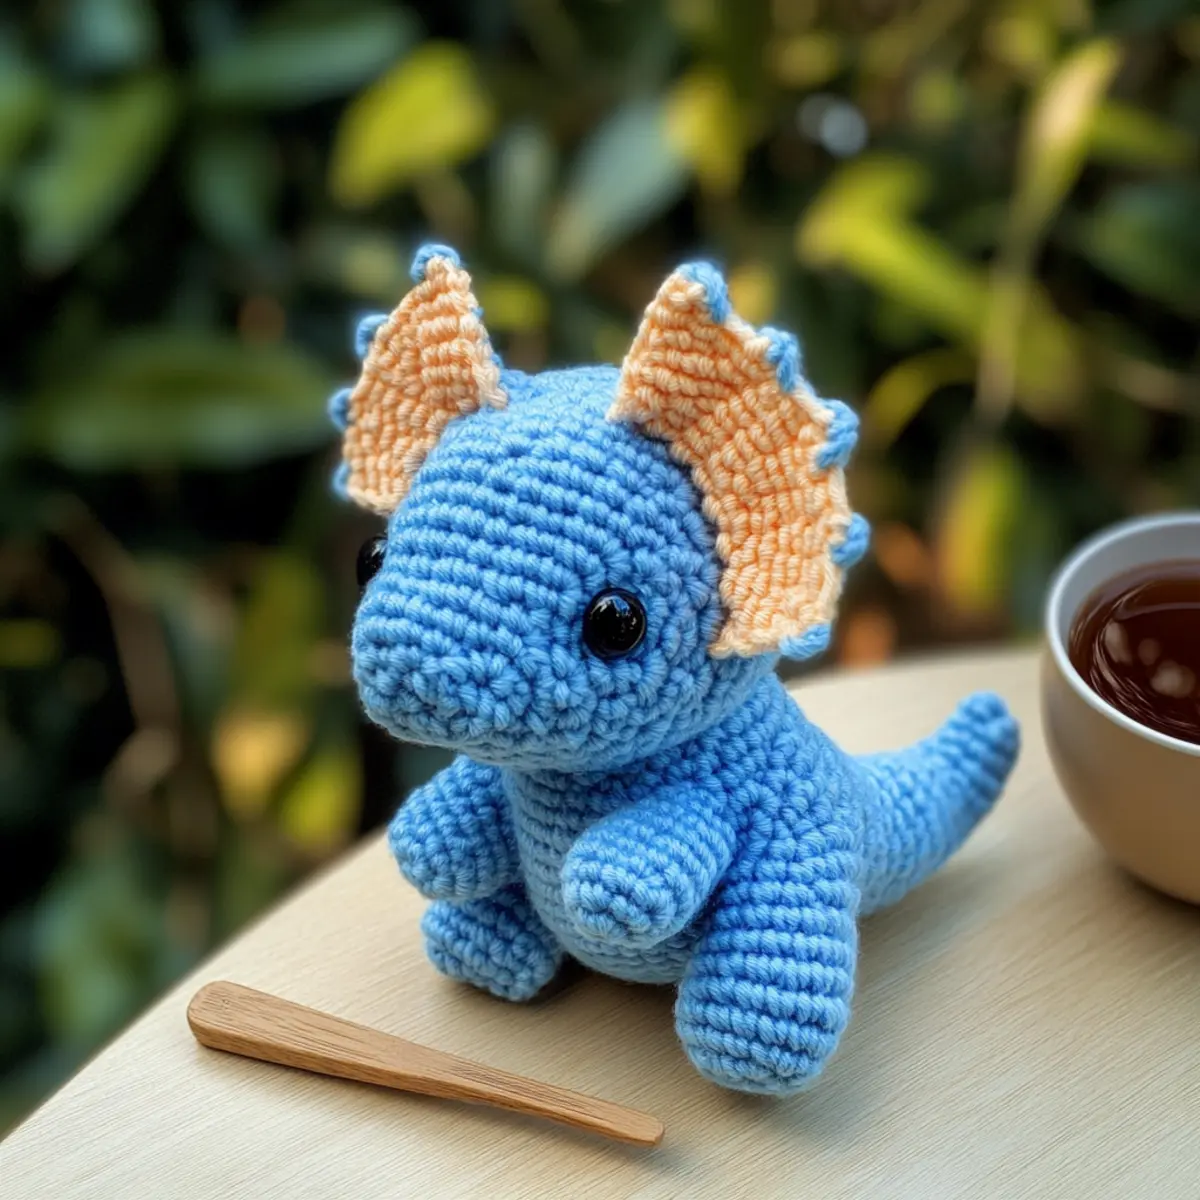
Expert Tips for No-Sew Triceratops
- Check Tension: Maintain even tension while working in continuous rounds to ensure a smooth finish and prevent visible stuffing when using plush yarn.
- Count Wisely: Regularly count your stitches at the end of each round. It helps keep your triceratops’ proportions correct and saves you from unraveling.
- Stuff Firmly: Use enough stuffing, especially in the neck area. A well-stuffed dino holds its shape better, making your creation look plump and cuddly.
- Secure Ends: Don’t forget to weave in all loose ends firmly. This step is crucial to prevent any accidental unraveling and to keep your adorable crochet safe for playtime.
- Use a Stitch Marker: Place a stitch marker at the beginning of your rounds to keep track of where each new round starts, especially in continuous crochet projects like this fun triceratops.
No-Sew Triceratops Amigurumi Variations
Feel free to elevate your crochet experience by personalizing this charming triceratops pattern.
- Yarn Substitutions: Opt for cotton yarn for a lighter option; it creates a more delicate dino that’s still adorable.
- Color Customization: Change up the hues based on your favorite dinosaur colors. Think bright oranges or purples for a playful twist.
- Size Adjustments: Swap to a bulky weight yarn or use a larger hook for a bigger triceratops that captures attention in any room.
- Texture Play: Add fun textures by introducing fringes or mini pom-poms to the tail or frill for added flair.
- Creative Accessories: Consider crocheting a cozy scarf or a little hat to give your dino more personality. A touch of whimsy can inspire storytelling!
- Creative Color-Blocking: Change colors every few rows to give the body a unique patchwork appearance, making it a feast for the eyes.
- Different Eyes: Instead of safety eyes, try different styles of embroidered eyes for a more whimsical vibe. It’s a charming shift that adds character.
- Enhanced Embellishments: Stitch a tiny collar or a cute bow made from a contrasting yarn to bring extra charm to your lovable triceratops.
Explore even more creative ideas and tips in our guide on essential crochet modifications to enhance your crafting journey!
Washing & Care for Your Triceratops Amigurumi
-
Hand Washing: Gently hand wash your triceratops in cold water using a mild detergent. This method preserves the soft texture and prevents any felting from agitation.
-
Drying: Lay your finished triceratops flat on a clean towel to dry. Avoid hanging, as this can distort its shape; gentle reshaping may be needed while it dries.
-
Storage: Store your cuddly dino in a cool, dry place, away from direct sunlight. This prevents fading of colors and maintains the cozy appearance of your plush creation.
-
Maintenance: For minor dust or dirt, simply spot clean with a damp cloth. Keeping your no-sew triceratops well cared for ensures it remains a delightful companion for years to come.
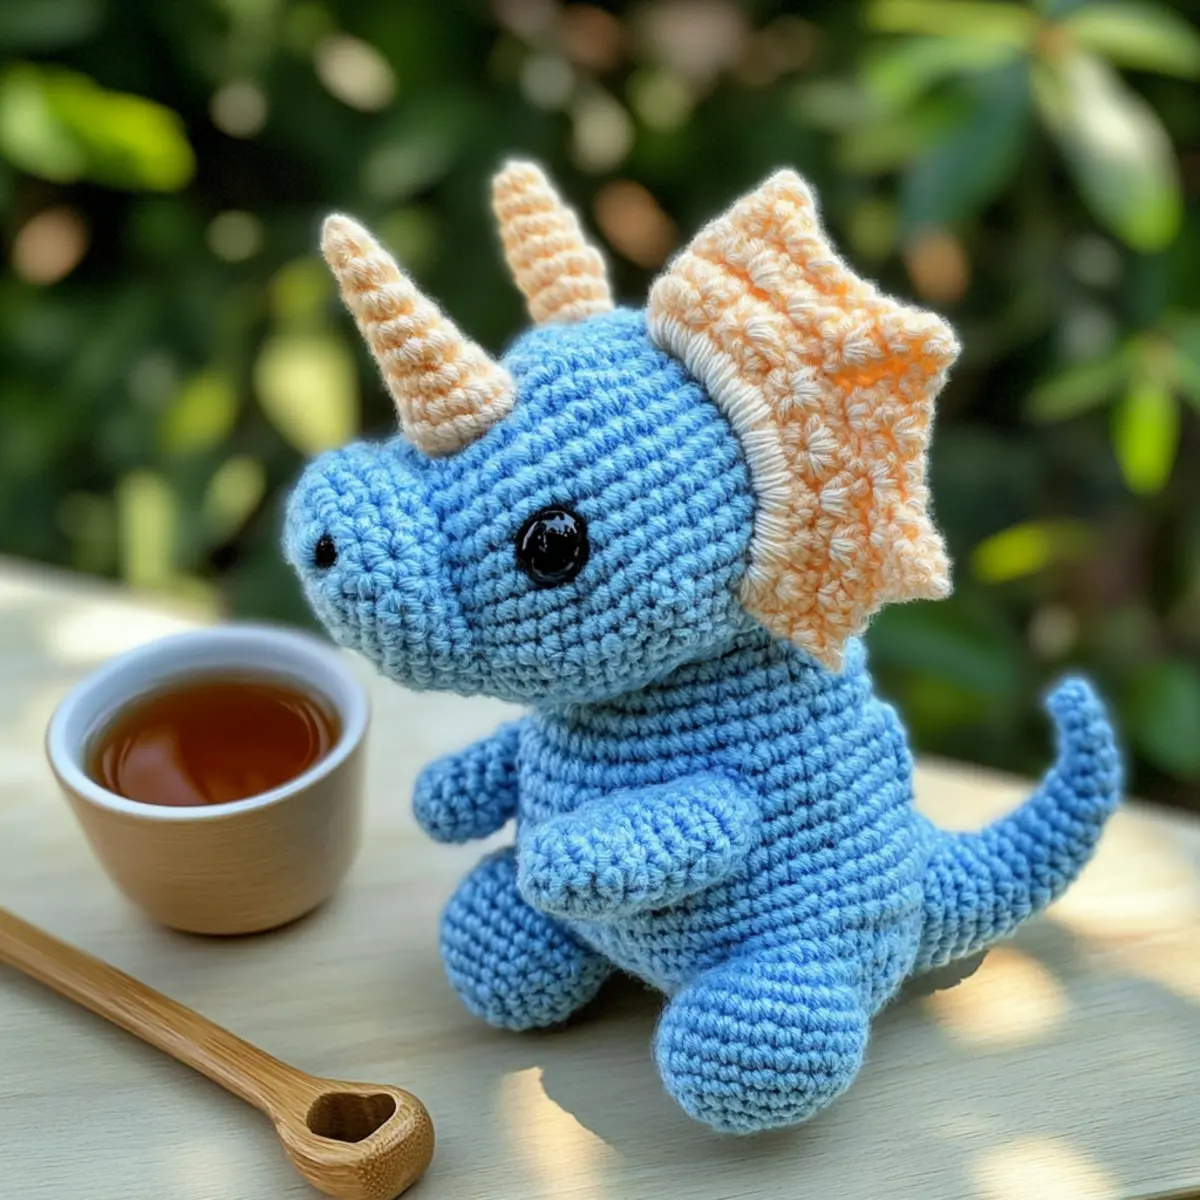
No-Sew Triceratops Amigurumi FAQs
What yarn can I substitute if I don’t have worsted weight yarn?
Absolutely! If you don’t have medium weight yarn on hand, you can use a lighter weight yarn, just keep in mind you may need to adjust your hook size to achieve the same plushiness and structure. Remember, using a thinner yarn may result in a smaller triceratops, so you might need to increase your stitch count a bit to maintain shape.
How can I adjust the size of my no-sew triceratops?
To make your triceratops bigger or smaller, you can simply switch to a different yarn weight and corresponding hook size—try using bulky yarn with a larger hook for a plumper dino or a sport weight for a smaller version. When adjusting, keep your gauge in mind by making a small swatch, as this will help ensure your dimensions turn out just right!
Why is my triceratops work curling at the edges?
Don’t panic! If you notice curling, it might be due to inconsistent tension or not enough stitches in your initial rounds. To fix this, take a look at your stitch number and try adding a few increases in the early rounds to ensure a smoother, flatter base. Holding your yarn with consistent tension also helps!
What if I dropped a stitch while crocheting my triceratops?
It’s an easy fix! Simply pull back to the last solid round, gently untwist your yarn, and recreate the stitch. If you’re using plush yarn, be careful to avoid creating too much tension, as that can make it harder to see your stitches. If it’s hard to find it, using a stitch marker in your rounds can help prevent this situation in the first place!
What hook size should I use for this pattern?
For this no-sew triceratops, I recommend a 4.5 mm (US 7) hook. If you find that your stuffing is visible, try going down a hook size for tighter stitches. Always make a quick test swatch to ensure you’re getting the desired tension!
Can I use safety eyes, and how do I attach them?
Absolutely! Safety eyes add a wonderful touch to your triceratops. It’s best to attach them before finishing the head to avoid having to work later on while the head is already stuffed. Make sure they are securely locked in place to keep your plush safe during playtime!
Leave a Reply