
Bring a splash of whimsy to your child’s wardrobe with the adorable Cute Crochet Strawberry Cardigan Pattern Made With Granny Stitch! Designed with little ones aged one to five in mind, this charming cardigan combines playful strawberry details with cozy comfort, making it a delightful choice for every day or special occasions. Whether you’re an experienced crocheter or a passionate beginner, this pattern is sure to become a treasured project.
The cardigan features a beautiful top-down construction using the classic granny stitch, giving it a light and airy feel that’s perfect for layering. With sweet strawberry motifs adding an imaginative touch, you’ll love the way your little one lights up in this stylish garment. Paired with DK weight yarn, the finished piece boasts a soft drape, ensuring both comfort and warmth. Customize the cardigan with your preferred color combinations and strawberries placed just where you want them!
Don’t let the idea of constructing this delightful cardigan intimidate you! While it may look intricate, this crochet pattern is approachable and designed to keep the vibe fun and relaxed. So grab your hook, select your favorite yarn, and get ready to create a cozy, one-of-a-kind cardigan that your child will adore. Let’s turn that yarn into an adorable statement piece!
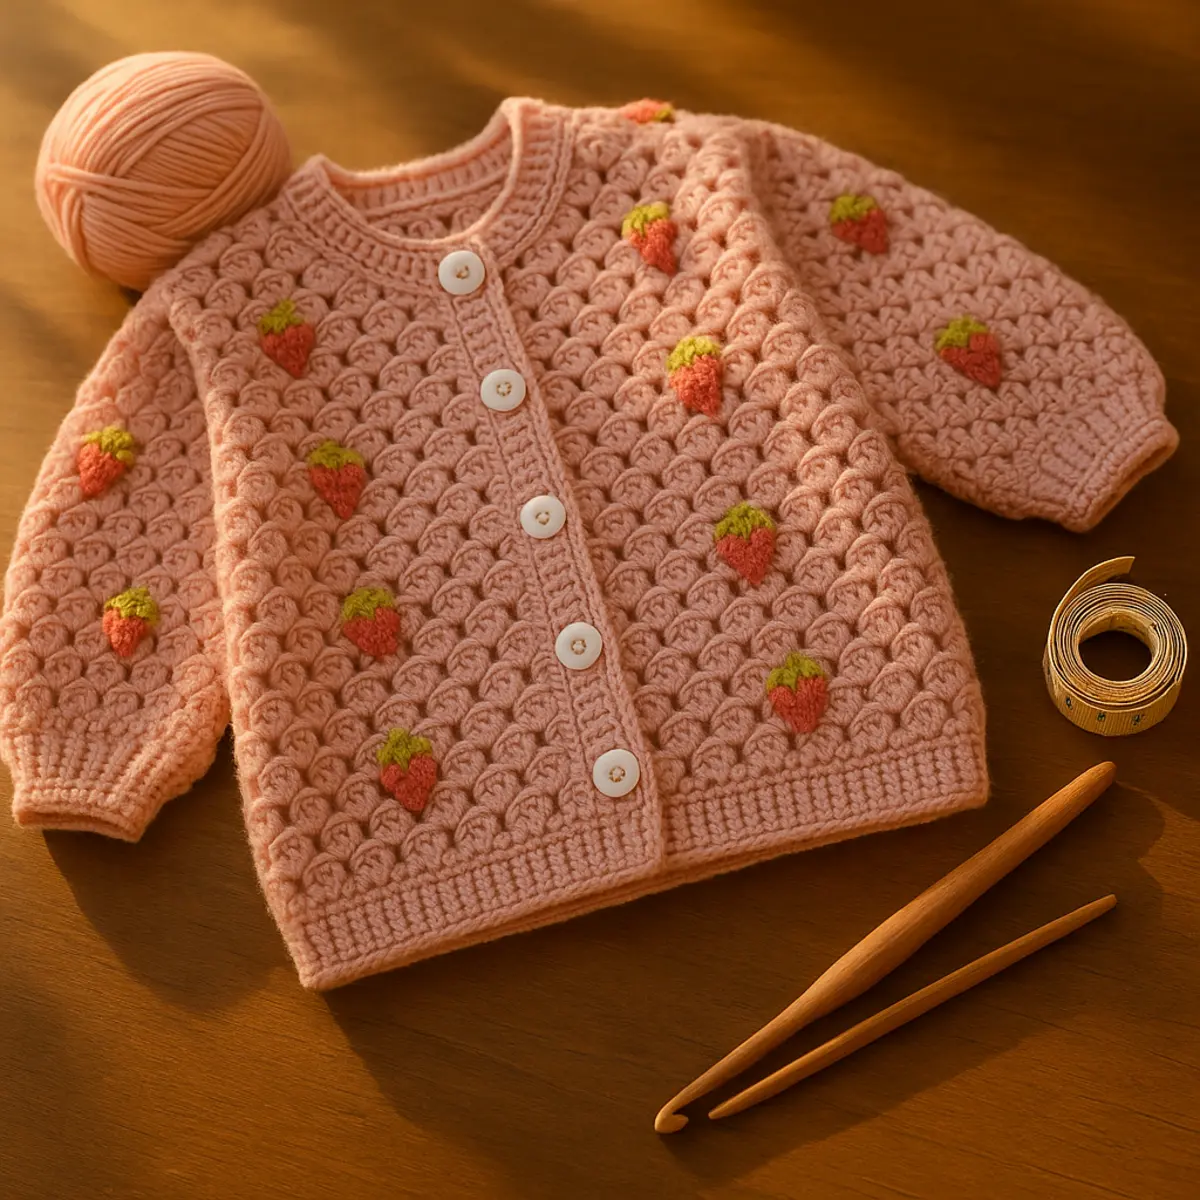
The Cute Crochet Strawberry Cardigan Pattern Made With Granny Stitch is a whimsical and cozy project designed for little ones aged one to five, showcasing delightful strawberry motifs that add a playful charm. This accessible pattern, perfect for beginners and seasoned crocheters alike, utilizes a top-down construction method with DK weight yarn and a 4 mm or 4.5 mm crochet hook to create a light yet warm cardigan. You’ll enjoy crafting this cheerful piece, which comes in customizable sizes and styles, ensuring your child has a unique and comfortable garment suitable for everyday wear or special occasions.
Materials Needed
Welcome to your fun crochet adventure! Gathering the right supplies for the Cute Crochet Strawberry Cardigan will set you on the path to creating a delightful and cozy garment for little ones. This project is as enjoyable as it is rewarding, making it perfect for crafty parents or gift-givers. Let’s gather the essentials to get started!
- Yarn: DK weight yarn in your main color, approximately 200 to 250 grams, along with small amounts of red and green yarn for the adorable strawberry details. The DK weight yarn is perfect for this cardigan as it strikes a balance between warmth and breathability, ideal for little ones.
- Hook: A 4 mm crochet hook is recommended for the main pattern to ensure the stitches are tight enough for a structured look. If you prefer a softer drape, you can opt for a 4.5 mm hook instead.
- Stitch Markers: These are essential for keeping track of your sections and shaping the cardigan accurately. They will help you identify the front, sleeves, and back areas as you work.
- Measuring Tape: A handy tool for checking dimensions, especially when adjusting the sizing for different age groups or for individual fit.
- Scissors: For cutting yarn at the end of each project segment, a good pair of scissors will save you time and effort, ensuring clean edges.
- Tapestry Needle: This is crucial for weaving in ends and sewing on any strawberry motifs or buttons you choose to add.
- Buttons: Approximately 2 cm in size, these will add an extra touch of charm and functionality to your cardigan.
Pro Tip: If you find yourself in need of yarn substitution, look for a DK weight yarn with a similar fiber content to maintain the same softness and drape as indicated in the pattern. Plus, selecting vibrant colors can enhance the playful strawberry theme!
Abbreviations
This pattern is written in standard US terms. Below are the abbreviations you’ll encounter throughout the Cute Crochet Strawberry Cardigan Pattern Made With Granny Stitch.
- ch: Chain
- dc: Double Crochet
- hdc: Half Double Crochet
- inc: Increase – typically worked by adding two stitches into the same stitch
- sl st: Slip Stitch
- st(s): Stitch(es)
- tbl: Through the Back Loop – a technique used to create a different texture
Foundation Loop
Start by creating a slip knot with your DK weight yarn and place it onto your hook.
- Chain 3: This initial chain will serve as the foundation for your first loop. Insert your hook into the first chain and work 1 double crochet into that same chain to create the first loop.
- Create Additional Loops: Chain 3 again, then insert your hook into the bottom of the previous loop. Work 1 double crochet to form a new loop.
- Repeat: Continue this loop sequence until you have a total of 22 loops for a size 2-3 years, or adjust based on your neck measurement.
Expected Result: By the end of this step, you should have a foundation row of 22 loops, creating a circular foundation for your cardigan.
Placing Stitch Markers
Using your stitch markers, you will now define the areas for the front sections, sleeves, and back.
- Front Section: Count 3 loops from the beginning and place a marker in the 4th loop.
- First Sleeve: Count another 3 loops from the previous marker and place a marker in the 4th loop.
- Back Section: Count 6 loops and place a marker in the 7th loop.
- Second Sleeve: Count 3 loops from the back marker and place a marker in the 4th loop.
- Second Front Section: The remaining loops will form the second front section.
Expected Result: You should now have stitch markers in place to guide you in the construction of the cardigan.
Yoke Construction (Rows 1 to 3)
We will be working in rows to create the yoke of your cardigan.
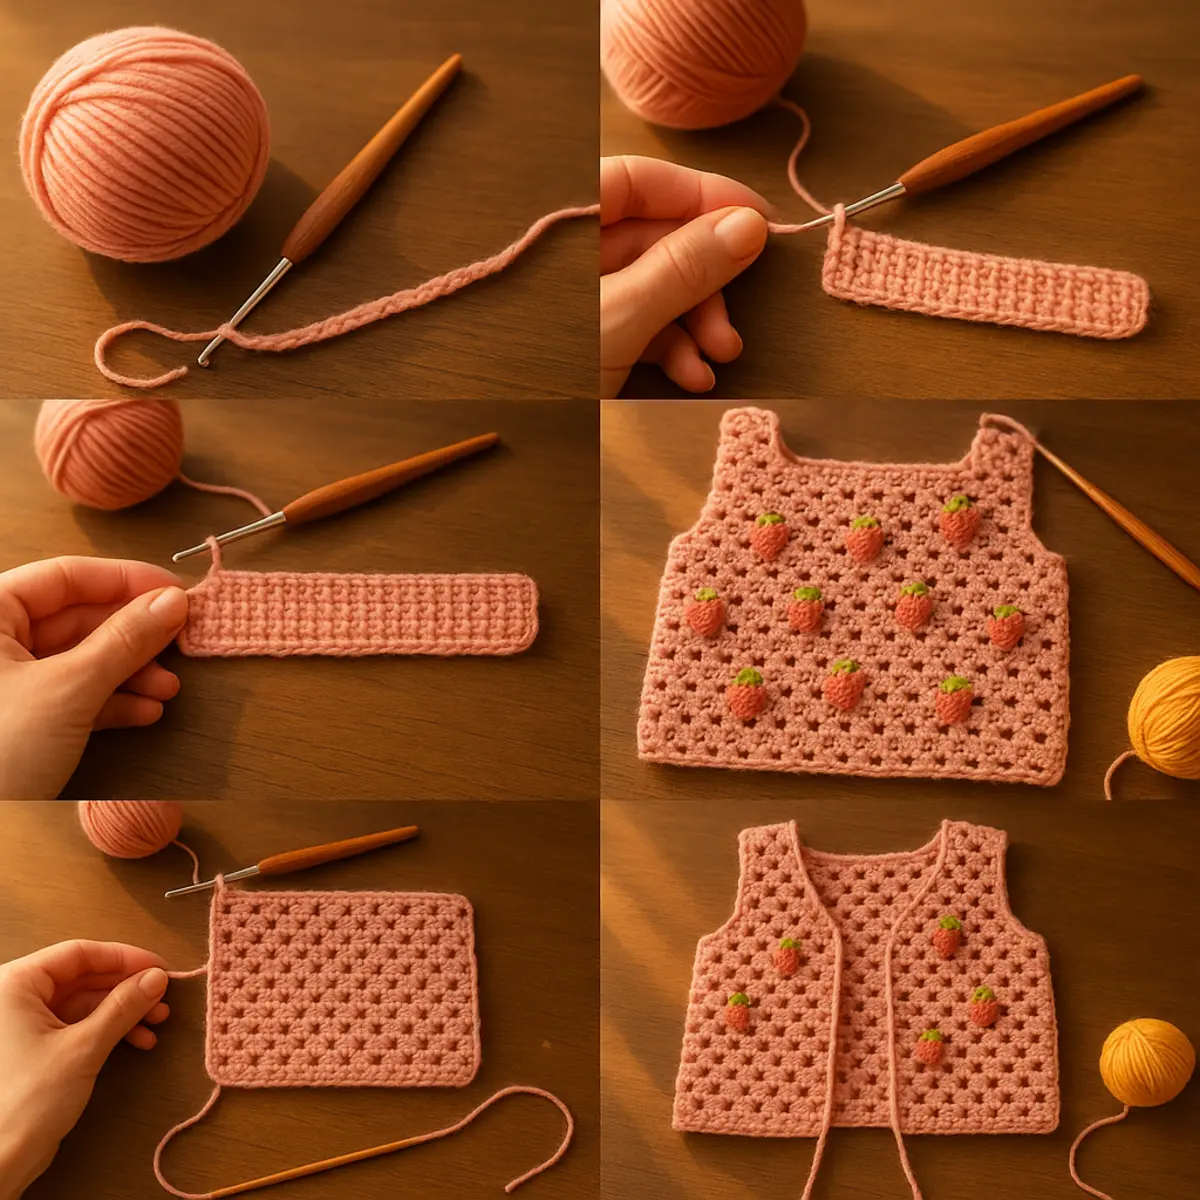
- Row 1: Chain 2, turn your work, then work 3 double crochets in each loop with a chain 1 between each cluster. In the marked corner loops, work 2 double crochets, followed by a chain 2, and finish with 2 double crochets.
- Row 2: Chain 2, then work 1 double crochet in the first space. Continue with the granny stitch across, making your corner increases, and finish with 2 double crochets at the end.
- Row 3: Chain 2, work granny stitch across, and finish with 1 double crochet.
Expected Result: At the end of this section, your yoke should be wide and spacious, fitting comfortably around the neck.
Making a Strawberry Motif
Now we will create the playful strawberry motifs for decoration.
- Attach Green Yarn: Join your green yarn in the last stitch of a 3 double crochet cluster. Chain 1.
- Create Strawberry Shape: Work 1 half double crochet, then 2 half double crochets, and finish with 1 half double crochet across.
- Attach Red Yarn: Join your red yarn in the first green stitch, chain 1, and work 4 double crochets together across. Chain 2 and fasten off.
- Finishing the Strawberry: On the next row, work 3 double crochets, chain 1, and slip stitch into the top of the strawberry. Chain 1 and continue by working 3 double crochets in the next space.
Expected Result: You should see cute strawberry motifs appearing, ready to be sewn onto the cardigan.
Shaping the Shoulders (Rows 4 and 5)
In these rows, we will shape the shoulders of the cardigan.
- Row 4: Work only 3 double crochets in the corner spaces without any increases.
- Row 5: Work granny stitch across, skipping the previous corner clusters.
Expected Result: The shoulders should be well defined, leading into the body of the cardigan.
Joining the Body
We will now join the body sections to create the cardigan.
- First Front Section: Crochet across the first front section to the corner, working 1 double crochet, chain 1.
- Sleeve Section: Skip the sleeve section and work 1 double crochet into the next corner space.
- Back Section: Continue across the back and repeat this process for the second sleeve.
- Underarm Spaces: On the next row, work 3 double crochets into each underarm chain space to fill in the gaps.
Expected Result: The body of the cardigan should be joined, creating a seamless flow from the front to the back and sleeves.
Finishing the Body
In the final phase of this section, we will finish up the body of the cardigan.
- Granny Stitch Rounds: Continue working granny stitch in rounds for the body.
- Add Strawberry Motifs: Place strawberry motifs as desired on the front and body until you reach your preferred length.
- Allow for Ribbing: Make sure to leave some space for ribbing to be added later, ensuring a comfortable fit.
Expected Result: By the end of this section, your cardigan should have a lovely granny stitch pattern with adorable strawberries, ready for ribbing at the bottom.
Frequently Asked Questions
Gathering the right supplies is essential to creating your adorable Crochet Strawberry Cardigan. By choosing the appropriate tools and materials, you’ll ensure a smooth crochet experience as you bring this charming project to life. Let’s dive into what you’ll need!
- Yarn: DK weight yarn is your best choice for this cardigan, roughly 200 to 250 grams in a main color, with small amounts of red and green yarn for the delightful strawberry details. DK weight yarn strikes a perfect balance, providing warmth without being too bulky, making it a cozy garment for little ones.
- Crochet Hooks:
- 4 mm crochet hook: This is the primary hook size, ideal for achieving the desired stitch definition with the granny stitch technique.
- 4.5 mm crochet hook: Optional for a softer drape, this hook size can be used if you prefer a looser fit or to achieve a whimsical, airy texture.
- Notions:
- Stitch markers: Essential for marking pattern points, these will help you keep track of your progress and ensure accurate shaping throughout the cardigan.
- Measuring tape: A must-have for confirming sizes and ensuring the cardigan fits perfectly as you go along.
- Scissors: Necessary for trimming yarn tails and cutting your yarn with precision.
- Tapestry needle: This tool is important for weaving in ends and securing your strawberry motifs neatly into place.
- Buttons: Approximately 2 cm in size to add a finishing touch to your cardigan, giving it that professional look.
Pro Tip: When selecting your yarn colors, consider a main color that is versatile and can mix well with the red and green of the strawberry details. For yarn substitution, ensure that any alternative yarn maintains a similar tension by checking the label’s gauge recommendations against your current pattern gauge.
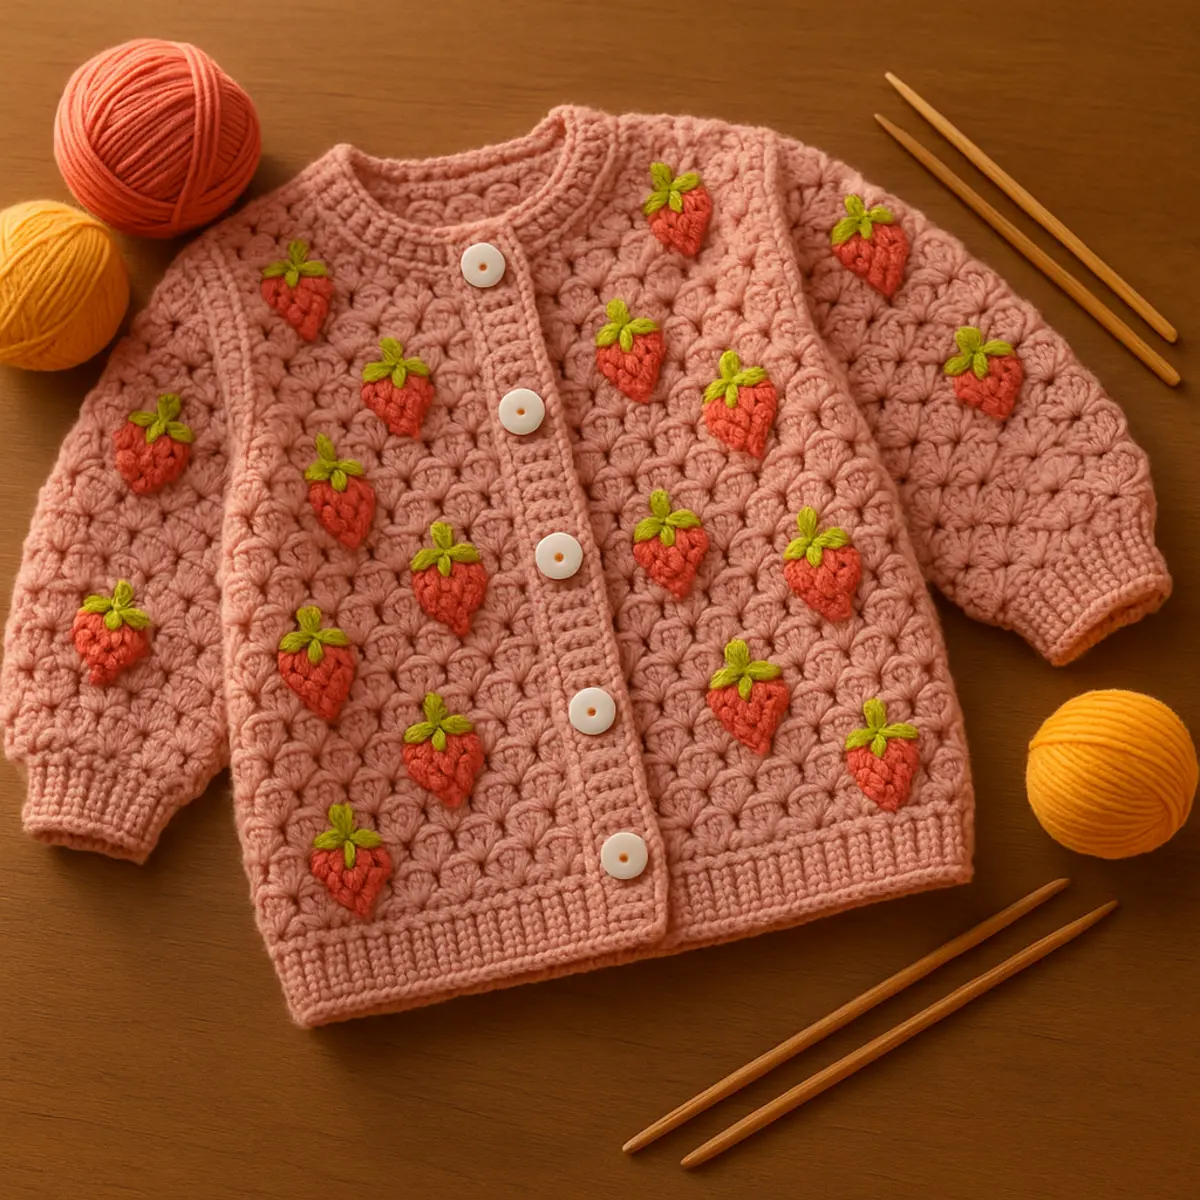
Congratulations on completing your adorable Cute Crochet Strawberry Cardigan made with the charming granny stitch! You’ve crafted not just a piece of clothing, but a delightful expression of your creativity. We encourage you to share photos of your beautiful creation with fellow crafters to inspire and spread the joy of crocheting!
If you loved making this, you should also check out our Easy Crochet Flower, try your hand at Simple Crochet Flowers, or explore our Flower Patterns!
Leave a Reply