
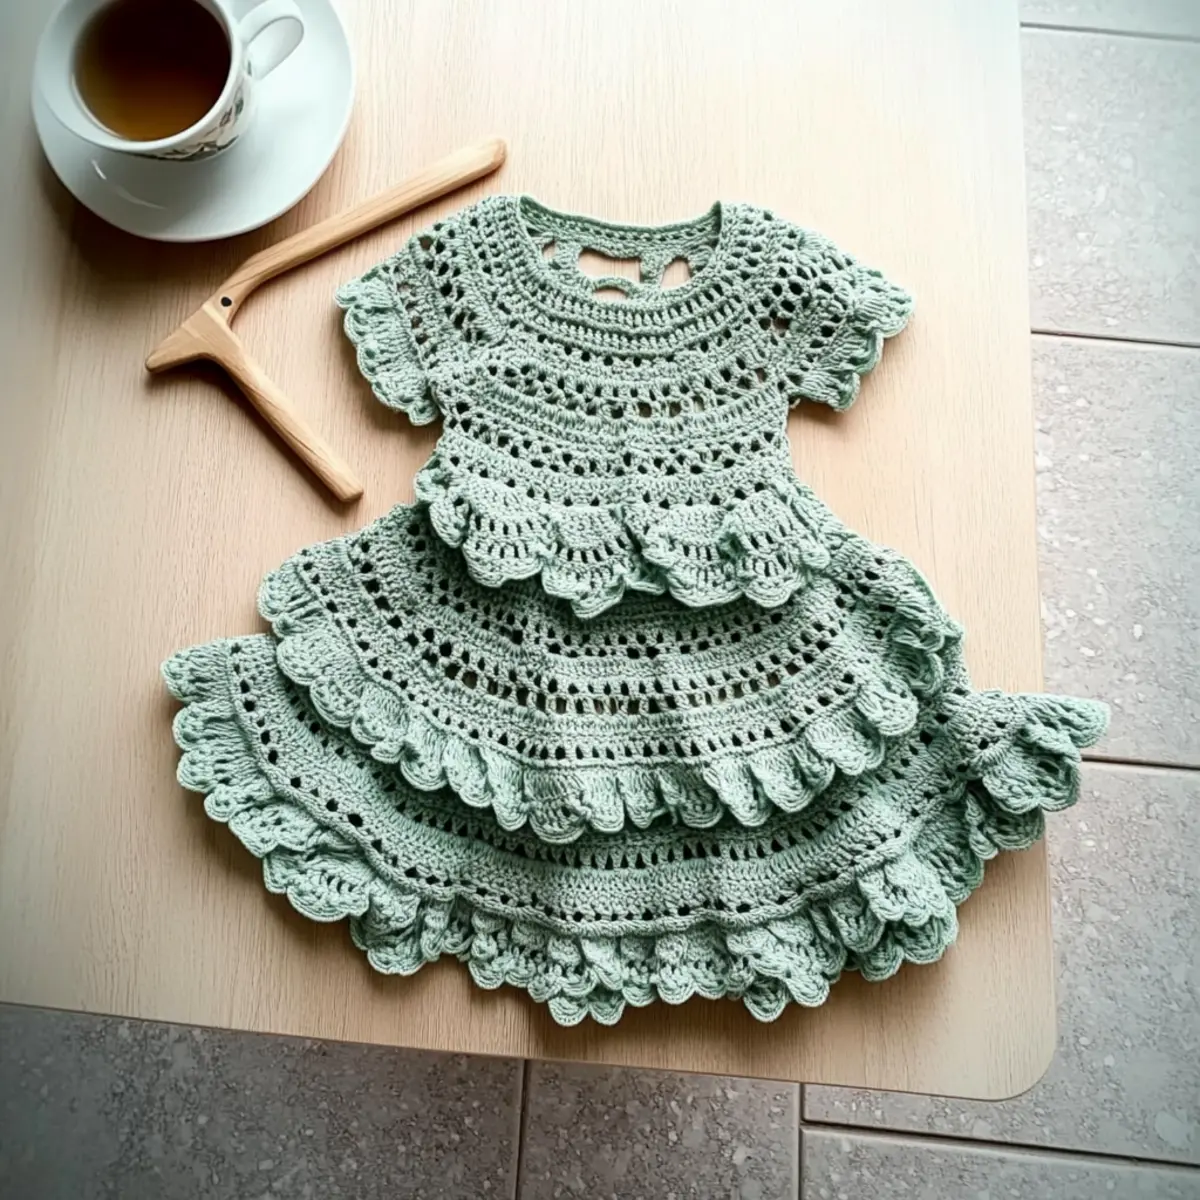
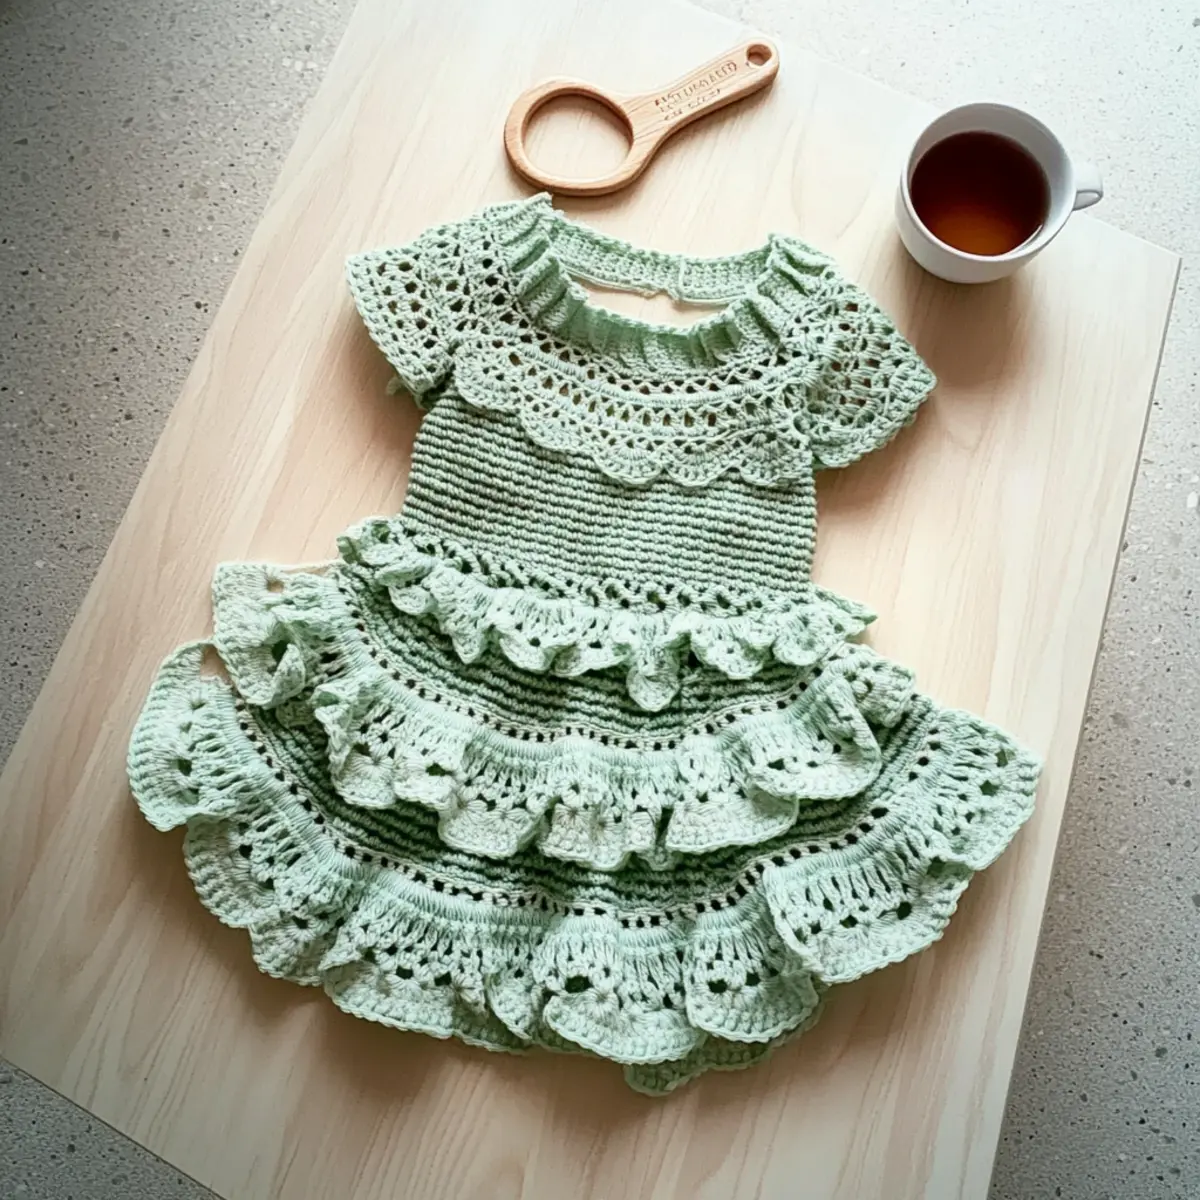
With the softness of cotton yarn slipping through my fingers, I can’t help but imagine the joy this Heirloom Mint Green Lacy Baby Dress will bring to little ones. This delightful crochet pattern, infused with tiered ruffles and sweet flutter sleeves, is perfect for gifted hands ready to take on an intermediate project. Not only will you create an exquisite piece that can be passed down through generations, but you’ll also experience the satisfaction of a project that works up in just 12 to 18 hours. Whether you’re preparing for a baby shower or a special christening, this stylish dress will keep babies cozy and chic. Ready to embark on this project and create something truly special? Let’s dive into the details and get stitching!
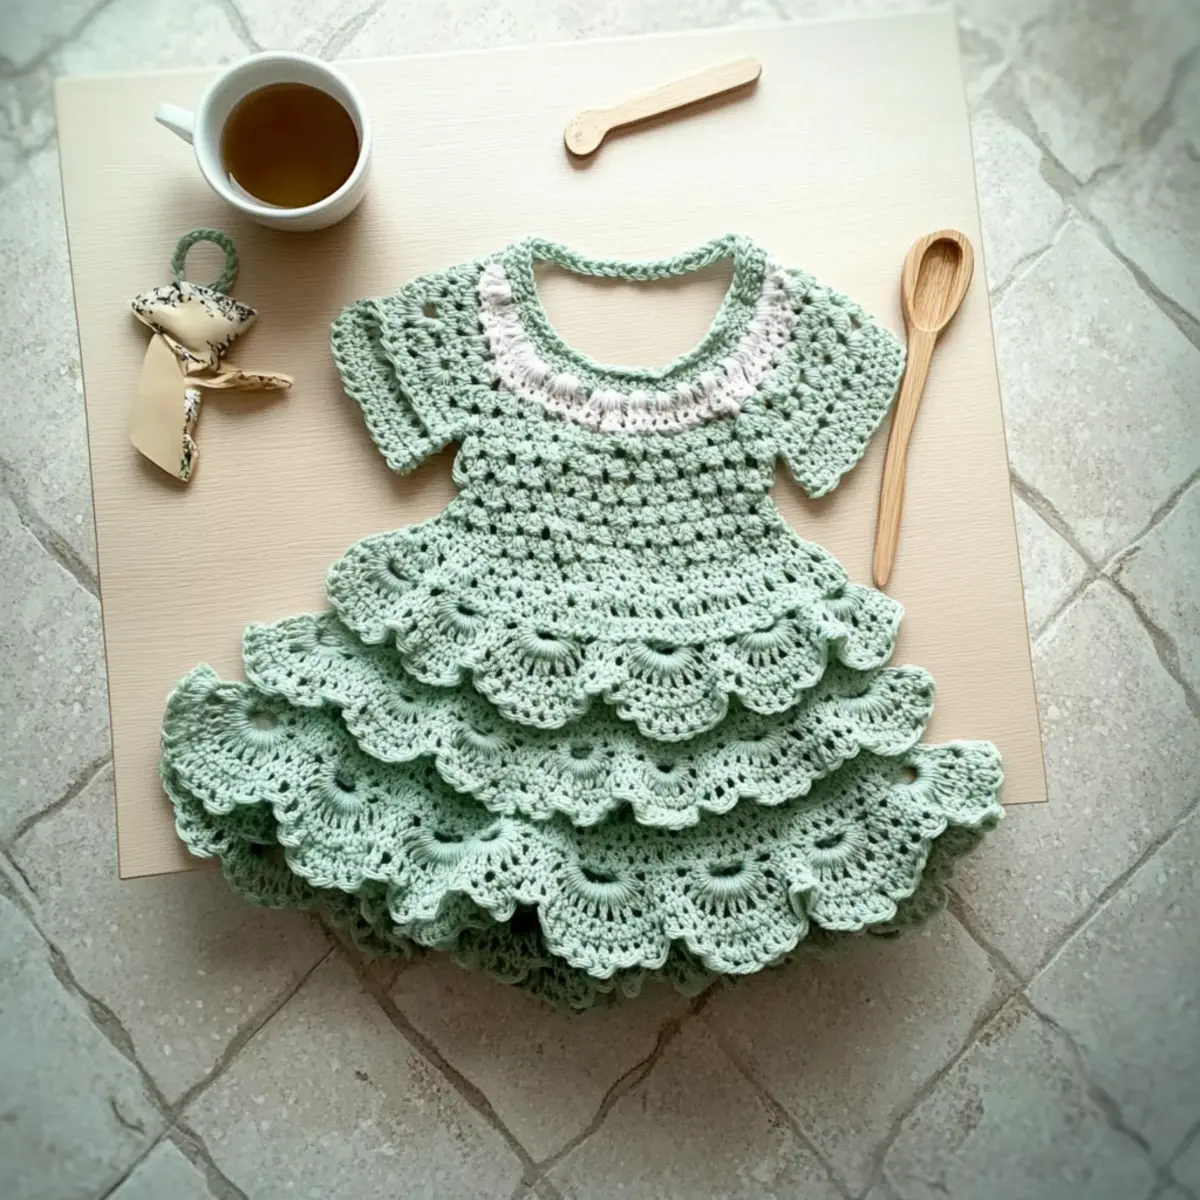
Mint Green Lacy Baby Dress Materials & Tools
• Gather your materials and get ready to bring the Mint Green Lacy Baby Dress to life!
Yarn
- Lion Brand 24/7 Cotton – 100% mercerized cotton; you’ll need 2 skeins each in Mint and Sage, totaling 372 yards.
- Paintbox Yarns Simply DK – Affordable and soft; requires 2 skeins of Color A (Spearmint) and 3 skeins of Color B (Pistachio), giving you a cozy 682 yards.
- Drops Safran – A wonderful cotton-polyamide blend; grab 2 skeins of each color for 366 yards of delightful fabric.
Hook Size
- E-4 (3.5 mm) Hook – Use this size for the bodice to create a snug fit.
- F-5 (3.75 mm) Hook – Ideal for the skirt, giving your tiers a lovely drape.
Notions
- Stitch Markers – Essential for keeping track of your stitches throughout the project.
- Tapestry Needle – For weaving in those pesky ends and securing your beautiful creations.
- Satin Ribbon – Adds a charming touch to your finished dress, perfect for tie detailing or embellishments.
- Buttons – Choose some decorative buttons to enhance the cuteness factor and complete the look!
Why is This Dress a Must-Make?
Uniqueness: This Mint Green Lacy Baby Dress showcases a charming two-tone design that beautifully combines Mint and Sage, setting it apart from ordinary baby gifts.
Heirloom Quality: Crafted with care, this crochet project can be cherished for years, making it an ideal heirloom piece for any family.
Intermediate Challenge: Perfect for those looking to level up a bit, offering delightful challenges like ruffled tiers and lace techniques.
Time-Saving: With an estimated completion time of just 12 to 18 hours, this project fits well into busy schedules while still delivering an enchanting result.
Customizable Options: Play with colors and length to make this dress truly yours, fitting every little one’s personality effortlessly!
Perfect Gift: Whether for baby showers or christenings, this exquisite piece makes a memorable gift that will be treasured by new parents.
Gauge & Sizing Notes
Don’t skip the gauge swatch! It’s essential for ensuring your Heirloom Mint Green Lacy Baby Dress fits beautifully, especially with the fitted yoke. For this dress, the standard gauge is 20 stitches and 22 rounds in single crochet using an E-4 (3.5 mm) hook for a 4×4 inch (10×10 cm) square. If you’d like to make adjustments, simply increase your starting chain in multiples of 12 for added width or add rounds to the skirt tiers for length. If your tension doesn’t match, and your swatch is smaller, consider trying a larger hook size to create the cozy, airy feel this dress deserves.
Step‑by‑Step Pattern for Heirloom Mint Green Lacy Baby Dress
Row 1: Bodice Foundation Chain
Ch 56 using Mint yarn to create the foundation for the bodice. Join with a sl st to form a ring, ensuring there are no twists in the chain. This initial chain will serve as a sturdy base for further stitches, laying the groundwork for the delicate lace design to come.
Row 2: Starting the Bodice
Ch 1, then sc in each ch around (56 sts), join with a sl st to the first sc. This round establishes a solid start for the bodice and gives the dress a neat edge. Your work should begin to feel like an open circle as you progress to the next round.
Row 3: Creating Shape
Ch 1, inc in next st, sc in next st; repeat from * to * around (84 sts). This round increases the stitch count while shaping the bodice for a fitted look. Your work should start to cup slightly as it forms the neckline.
Row 4: Adding Depth
Ch 1, sc in each st around (84 sts), join with a sl st. Here, you are simply reinforcing the bodice with a solid round of sc, ensuring it’s sturdy yet flexible. The bodice will start taking on a nice curve as you complete this round.
Row 5: Raglan Shaping
Ch 1, inc in next st, sc in next 3 sts; repeat from * to * around (105 sts). This creates a decorative raglan increase, allowing the sleeves to form gracefully. Your bodice should feel roomy due to the additional stitches and start resembling your envisioned design.
Row 6: Sleeve Separation
Ch 1, sc in next 10 sts, ch 8, skip 8 sts for armhole; repeat around. Join with sl st. The armhole ch provides ease for the future sleeves, while the sc creates defined sections for separation. Your work should now display a clear division for the bodice and future sleeves.
Row 7: Working the Sleeves
Ch 1, sc in each st in the armhole (8 sts), then join to the body with sl st. This defines the first sleeve section. Your fabric should look distinct, having transitioned smoothly from the bodice into a sleeve.
Row 8: Sleeve Body
Ch 1, sc in each st around the sleeve (8 sts), join with sl st. Repeat this around, establishing the height of the sleeve. The sleeve will begin to take shape, showcasing the soft drapability of your chosen yarn.
Row 9: Body and Skirt Transition
Ch 1, sc in each st of the bodice and sleeves (105 sts). This round joins them together into the main body. The entire structure will feel more unified, creating a cohesive look as you prepare to start the skirt portion.
Row 10: Skirt Foundation
Ch 1, sc in next 10 sts, dc in next st; repeat this pattern around (105 sts). This round starts the transition to the skirt, adding depth and allowing the fabric to flow more freely. Your dress should now show an inviting flare, hinting at the tiered design ahead.
Row 11: First Skirt Tier
Ch 1, sc, ch 3, sk next 2 sts, dc in next st; repeat around (35 shells). This round establishes the first tier’s lacy design with a series of shells, giving it the elegant texture characteristic of lacework. The skirt should start to take on a delightful airy feel.
Row 12: Second Skirt Tier
Repeat Row 11 for the second tier, working the shells directly over the first tier (35 shells). The lacy appearance should be prominent now, with each shell echoing the previous row’s work. Your skirt will have a full, layered effect as you build upon the design.
Row 13: Finishing the Skirt
Repeat Row 11 once more for the final tier (35 shells). This completes the lacy look, offering a voluminous effect perfect for twirling. The last tier brings your dress to life, creating a playful and ornate feature that little ones will adore.
Step 1: Edging
Ch 1, sc in each shell, ch 2, sc back in same shell; repeat around for a pretty scalloped edge, then join with a sl st. The edging adds a polished finish to the skirt and sleeves, giving a sweet, dainty touch to your heirloom Mint Green Lacy Baby Dress.
Step 2: Assembly and Finishing Touches
Weave in all ends with a tapestry needle and attach buttons for a cute closure at the back. Your dress should now be a complete work of art, ready for its special little wearer and to be cherished for years to come.
Expert Tips for Baby Dress
- Gauge Matters: Always check your gauge before starting, as the fitted yoke relies on precise measurements to create that heirloom-quality fit.
- Count stitches: Keep track of your stitches, especially during the bodice transition from Mint to Sage. Losing count can lead to uneven sections.
- Use Lifelines: When working on complex patterns like the lacy skirt, use a lifeline to easily unravel and fix mistakes without starting over.
- Join Seamlessly: Pay attention when joining the rounds to avoid twists in the fabric, ensuring the perfect finish for your baby dress.
- Finishing Touches: After completing the dress, block your work gently to enhance the airy texture and let those ruffles shine beautifully!
How to Wash and Care for Your Baby Dress
Machine Washing: Use a gentle cycle with cold water to protect the delicate fibers of your heirloom Mint Green Lacy Baby Dress, preventing any damage or pilling.
Drying: Lay the dress flat on a clean, dry towel to maintain its shape and ruffled design. Avoid hanging to prevent stretching.
Storage: Keep your cherished dress in a cool, dry place. Consider using a breathable cotton bag to prevent any dust while still allowing airflow.
Variations & Substitutions
Feel free to unleash your creativity and make this adorable dress uniquely yours!
- Length Adjustment: Add or reduce rounds in the skirt tiers to customize length for your little one. This simple tweak can transform the dress into a playful short style or an elegant long design.
- Color Combinations: Play with different color palettes! Consider a vibrant pink and soft lavender for a whimsical touch. Change the hues based on each season or occasion—how fun is that?
- Yarn Substitution: If you want a lighter feel, opt for a bamboo yarn blend to add a lovely sheen. It drapes beautifully while keeping it breathable for little ones.
- Texture Modifications: Add a fringe border at the hem for a boho twist. A bit of embellishment can turn this classic dress into a modern masterpiece!
- Fiber Alternatives: Swap the recommended cotton with soft, hypoallergenic yarn for babies with sensitive skin. Bamboo or merino wool are great options that maintain comfort and durability.
- Size Expansion: Easily adjust the pattern by increasing the starting chain for larger sizes, ensuring this stunning piece is available for more little ones!
- Personalized Details: Consider adding a cute pocket or a unique appliqué. Try a flower or animal design for a custom touch that tells its own story—perfect for imaginative little ones!
- Play with Slips & Straps: Transform flutter sleeves into spaghetti straps for a playful summer look! This variation keeps the lacy charm while giving it a fresh design twist.
With these delightful possibilities at your fingertips, you’re ready to make this baby dress truly one-of-a-kind. If you want to know more about color techniques, check out my post on color-blocking ideas for inspiration!
Mint Green Lacy Baby Dress FAQs
Can I substitute the yarn for this dress?
Absolutely! While I recommend using Lion Brand 24/7 Cotton for its softness and drape, you can also substitute with another worsted-weight cotton yarn. Just be sure to check your gauge after making any swaps to ensure that your dress retains that heirloom quality.
How can I adjust the size of the dress?
If you’re looking to make the dress a bit bigger or smaller, consider adjusting the starting chain for the bodice. A common method is to chain in multiples of 3 + 1, allowing you to customize the fit. For length, you can either add more rounds to the skirt or skip rounds to create a shorter version.
Why is my work curling at the edges?
Don’t panic! Curling edges often happen with crochet, especially in lightweight projects like this one. It’s usually due to the tension or the type of stitches used. You can try blocking the finished piece, which helps to smooth out those edges. Also, ensure you’re following the recommended hook sizes for each section.
What hook size should I use?
For this Mint Green Lacy Baby Dress, an E-4 (3.5 mm) hook is perfect for the bodice. Then, switch to an F-5 (3.75 mm) hook for the skirt to create that lovely drape. If you’re feeling adventurous, trying out different hook sizes can lead to unique fabric textures.
How do I fix dropped stitches in the lace pattern?
It’s an easy fix! If you notice a dropped stitch in the lacework, gently pull the loop back up through the previous stitches using a tapestry needle. If you’re unsure, don’t hesitate to unravel to just before the mistake and rework those few stitches; it helps maintain an even look.
Can I shorten the length of the skirt?
Absolutely! You can reduce the number of rounds in each tier of the skirt to achieve your desired length. Just remember to maintain the same lacy pattern for each tier to keep the beautiful ruffled design intact!
Leave a Reply